Thursday, 21 June 2012
The Easiest Cake Ever!
After a long drought, it felt great to return to blogging but I can't believe that two months has already gone by since my last one. The blog about chocolate encouraged me to write about some of our other regular sweet treats. We have plenty! This might be a real food, back-to-basics and sugar-free diet but that doesn't mean we are deprived of good stuff.
I bake bread most days here and the second most frequently baked item is banana cake. This is a wonder of a cake, because it contains hardly any ingredients. It has no flour, at all, making it very suitable for people on all kinds of exclusion diets (unless there is an egg allergy!) And it takes about a minute to prepare! So all positive!
Now, I have to admit, it isn't a favourite of mine. I find the texture a bit weird, but it is a HUGE hit with my two boys and with every kid who comes to visit. The other handy thing is that you can vary the size without any fuss, if you find your egg-basket or fruit bowl is running low. The cake works on a 1 banana per egg recipe so if you use 5 bananas you use 5 eggs and if you use 3 bananas use 3 eggs. It works perfectly using 3, 4 or 5 eggs. The honey is totally optional. I haven't put any honey in my cakes for months now and nobody noticed any difference! Banana is sweet enough!
Banana cake
3, 4 or 5 very ripe bananas
3, 4 or 5 eggs
1-2 tablespoons honey (optional)
1 tsp vanilla (optional)
Break up the bananas a bit and throw everything into your food processor or blender and blitz for a minute or two until the batter is smooth and creamy. Pour into a 20-22cm baking tin or silicone mould. Pop in the oven for one hour. The important thing is to keep your oven on a low temperature or your cake will burn. I use gas mark 2 or 3, so 150-170 C is perfect.
It can rise nicely in the oven but it will sink back a bit as it cools. The top will be brown which makes it look a lot like chocolate cake but the inside is a weird grey colour. It is very sweet with or without the honey and children will devour it in minutes!! You can also use the batter in all kinds of silicone moulds, it pours easily and sets well. I used it in Christmas stocking moulds last December and just recently in Easter egg moulds after the chocolate was finished. Make sure to keep it in the fridge, where it will last for 3 to 4 days, if your kids haven't eaten it all before then!
Saturday, 21 April 2012
Easter Treats
Last year at Easter, chocolate was completely abandoned in favour of two furry friends, Rocket and Hopper. Unfortunately, our lovely floppy-eared bunnies passed away in November from an unknown illness. Nobody tells you until it's too late that rabbits are notoriously fragile! I was really upset about it at the time, feeling totally responsible, but the vet assured me that it is a common occurrence for them to "just die". Our lovely neighbour's cat died at the same time so it seemed that there was some virus or infection about. We made them a nice burial place and decorated it with pretty stones, but they are much missed, they were such lovely pets.
This year, I mulled over whether it was worth taking a risk at making some sugar-free chocolate, having been on the diet for well over a year. I did some searching on SCD websites and many of them declared cocoa butter to be SCD legal but not cocoa powder. It's necessary to combine both to make chocolate so a bit of thought, consideration and judgement was involved. Eventually I decided to try it. I managed to find organic 100% cacao butter (it's called cacao when it's 100% cocoa) and organic 100% cacao powder in my local health-food shops. Weirdly enough, one shop had the butter and the other shop had the powder but neither had both!! The powder was actually from a company in Dublin www.natashaslivingfood.ie. The results were so good that I had to keep going back to the shop to re-stock! I believe I bought their entire stock of cacao butter!
Making the chocolate was surprisingly easy but the actual process of trying to make a hollow egg using a mould was very tricky!! I found a large mould in Art & Hobby shop a few months back and then a good friend noticed smaller moulds in Tesco in their Easter range. The large one was so hard to use, I had to swirl the chocolate around the mould for AGES!! And then try to chill it, then add more choc, then swirl again, then chill again - you get the picture! So in the end, only ONE large egg was made! The Tesco moulds were silicone and much easier to use, and then on Easter Saturday I found tiny teddy-bear moulds in Homestore & More. They were very cheap and so easy to use, no swirling involved!! The moulds can also be used with cake batter, I made banana-cake eggs for little Einstein as well as his very small allocation of chocolate.
The basic recipe is:
100g Cocoa Butter (not that easy to find but try good health food shops and online)
6 Tablespoons Cocoa Powder (Green & Blacks is good as well as Natasha's Living Food)
2-3 Tablespoons Honey (or maple syrup or agave if you're not on SCD!)
1 small pinch salt
I made this amount 3 or 4 times to make 1 large egg, 2 smaller eggs and 22 teddies!
First, you melt the cocoa butter in a large bowl sitting over a pot of barely simmering water. When fully melted, add the cocoa powder and mix well with a metal whisk. Keep the heat low and add the honey, one tablespoon at a time. Mix well and then taste to see if you need to add more honey. When I got to this stage, I thought I might fall down, the taste was just incredible. It's hard to be objective about it though, as I hadn't had a morsel of chocolate for over a year!! When you are happy with the sweetness you can add flavour if you wish, I added a few drops of vanilla. Then take the bowl off the heat and let it cool a bit, stirring every now and again. It's now ready for pouring into moulds or driving yourself crazy swirling it into eggs! Leave to set for about half an hour in the freezer and store in the fridge. Honestly, even if you're not on SCD, this is SO worth doing, for a special treat. I have never tasted chocolate like it, it seemed to intensify as it was melting in the mouth - DIVINE!! And thankfully for everyone, there were no side-effects!!
Tuesday, 27 December 2011
Christmas Cooking
Happy Christmas everyone! Tis the season of Peace on Earth, Goodwill to All Men, and of course, eating!! It is that time of year when, no matter how good you might be for the rest of the year, you let go and allow yourself to indulge in rich foods both sweet and savoury, delights such as chocolate, fruit cake, trifle, and roast potatoes, stuffing, bread sauce to name a few. Being on SCD means our family couldn't eat anything on the list I've just mentioned. But I have to say it has been a bumper Christmas, with glorious food, plenty of sweet treats and best of all, the most incredible turkey I've ever tasted.
We decided this year, inspired by the SCD experiment, that we would have a go at rearing our own turkey. Being on this diet really does give you a keen interest in everything you eat, where it comes from, and what's in it. What better way to ensure you could eat the purest, best meat than to "grow it yourself!" We got our turkey chick in September from a local farmer, from whom we buy vegetables every week. I had bought an oven-ready goose from him last year for Christmas, which was delicious so I knew he would get me a good turkey, and so he did.
She was a bronze turkey, which is different from conventional supermarket turkeys, which are white. As you can see, this one had black feathers with a few white stripes on the wings. Bronze turkeys put on weight slower than white turkeys and are considered to be tastier. Our turkey had the whole back garden to run freely around in, she pecked and foraged on the windfall apples and pears, lots of grass and bugs and she got the best of kitchen scraps. We also gave her about a handful of organic pellets each day. She was a very social bird, she liked the company of the chickens and in fact would call out if the chickens left her alone. She would run up to the back door as soon as it was opened and follow me around the garden or into the garage, sometimes nearly knocking me over in her haste to catch up with me. She was really nice to have around, a much friendlier bird than the selfish chickens!
But the time came to turn turkey into meat. It was a weird day. I went out to feed her and I couldn't look her in the eye! We were very lucky to have the help of my brother-in-law, an experienced chef, to guide us with the hard part, which I won't go into any detail about, except to say my husband did the deed, and I was very glad not to have to do it! The plucking was much easier than I had imagined and was over in a matter of minutes. Our son even plucked a few feathers! The bird was then hung for 4 days in our attic, as we have no shed, and the three cats in the garage were lying in waiting!
The cleaning out was really the most disgusting part! Just as well both of us have strong stomachs! Again, my husband did most of that part of it, I just held the bird and added encouragement!! He has had plenty of experience gutting and cleaning fish but this was a whole different story! You could use the giblets for stock or gravy but I only kept the liver. The dog and the cats had a feast with the other bits.
It was cooked for four hours, draped in Caroline Rigney's free-range, nitrate-free rashers. The stock made the most amazing gravy. We accompanied it with a mixed roasted vegetable dish that I found in the RTE guide a few months ago. It is a simple dish of Brussels Sprouts, leeks, carrots, beetroot and garlic drizzled in honey and warmed duck fat (you could use olive oil), and seasoned with thyme, rosemary, salt and pepper. The beetroot gives the whole thing a lovely festive colour and the roasting makes all the vegetables very sweet. I also made cranberry sauce which was incredibly easy, using honey instead of sugar.
And without doubt, it was the best turkey I've ever tasted. It was moist and had quite a rich distinctive taste. We'll definitely be thinking about doing it again next year!
We decided this year, inspired by the SCD experiment, that we would have a go at rearing our own turkey. Being on this diet really does give you a keen interest in everything you eat, where it comes from, and what's in it. What better way to ensure you could eat the purest, best meat than to "grow it yourself!" We got our turkey chick in September from a local farmer, from whom we buy vegetables every week. I had bought an oven-ready goose from him last year for Christmas, which was delicious so I knew he would get me a good turkey, and so he did.
She was a bronze turkey, which is different from conventional supermarket turkeys, which are white. As you can see, this one had black feathers with a few white stripes on the wings. Bronze turkeys put on weight slower than white turkeys and are considered to be tastier. Our turkey had the whole back garden to run freely around in, she pecked and foraged on the windfall apples and pears, lots of grass and bugs and she got the best of kitchen scraps. We also gave her about a handful of organic pellets each day. She was a very social bird, she liked the company of the chickens and in fact would call out if the chickens left her alone. She would run up to the back door as soon as it was opened and follow me around the garden or into the garage, sometimes nearly knocking me over in her haste to catch up with me. She was really nice to have around, a much friendlier bird than the selfish chickens!
But the time came to turn turkey into meat. It was a weird day. I went out to feed her and I couldn't look her in the eye! We were very lucky to have the help of my brother-in-law, an experienced chef, to guide us with the hard part, which I won't go into any detail about, except to say my husband did the deed, and I was very glad not to have to do it! The plucking was much easier than I had imagined and was over in a matter of minutes. Our son even plucked a few feathers! The bird was then hung for 4 days in our attic, as we have no shed, and the three cats in the garage were lying in waiting!
The cleaning out was really the most disgusting part! Just as well both of us have strong stomachs! Again, my husband did most of that part of it, I just held the bird and added encouragement!! He has had plenty of experience gutting and cleaning fish but this was a whole different story! You could use the giblets for stock or gravy but I only kept the liver. The dog and the cats had a feast with the other bits.
It was cooked for four hours, draped in Caroline Rigney's free-range, nitrate-free rashers. The stock made the most amazing gravy. We accompanied it with a mixed roasted vegetable dish that I found in the RTE guide a few months ago. It is a simple dish of Brussels Sprouts, leeks, carrots, beetroot and garlic drizzled in honey and warmed duck fat (you could use olive oil), and seasoned with thyme, rosemary, salt and pepper. The beetroot gives the whole thing a lovely festive colour and the roasting makes all the vegetables very sweet. I also made cranberry sauce which was incredibly easy, using honey instead of sugar.
And without doubt, it was the best turkey I've ever tasted. It was moist and had quite a rich distinctive taste. We'll definitely be thinking about doing it again next year!
Thursday, 22 September 2011
A Sugar-Free Birthday Party!
A few days ago my little Einstein celebrated his sixth birthday. He was so excited about this year's birthday, counting down the days from about 3 weeks beforehand. And he was looking forward to his party in a big way. On the morning of his actual birthday he arrived into my room, way too early, about 6.15, full of excitement and happiness. I was way too tired to be that excited so I pulled him under the covers and said, "its very early, let's go back to sleep, please!". He was quiet for about half a minute then whispered, "Mom" he paused with a giddy smile, "I'm six!!!!" It was a perfect moment.
The party was the following day. Usually little Einstein's birthday parties are outdoor affairs where the kids run wild around the garden and the adults have very little to do but sit around and chat! Unfortunately this September the weather did not behave for us. It rained on and off, but we made the best of it, and the kids all got outside, from time to time, for brief spurts, usually legging it from the house to the treehouse, or running after a chicken and getting very muddy shoes.
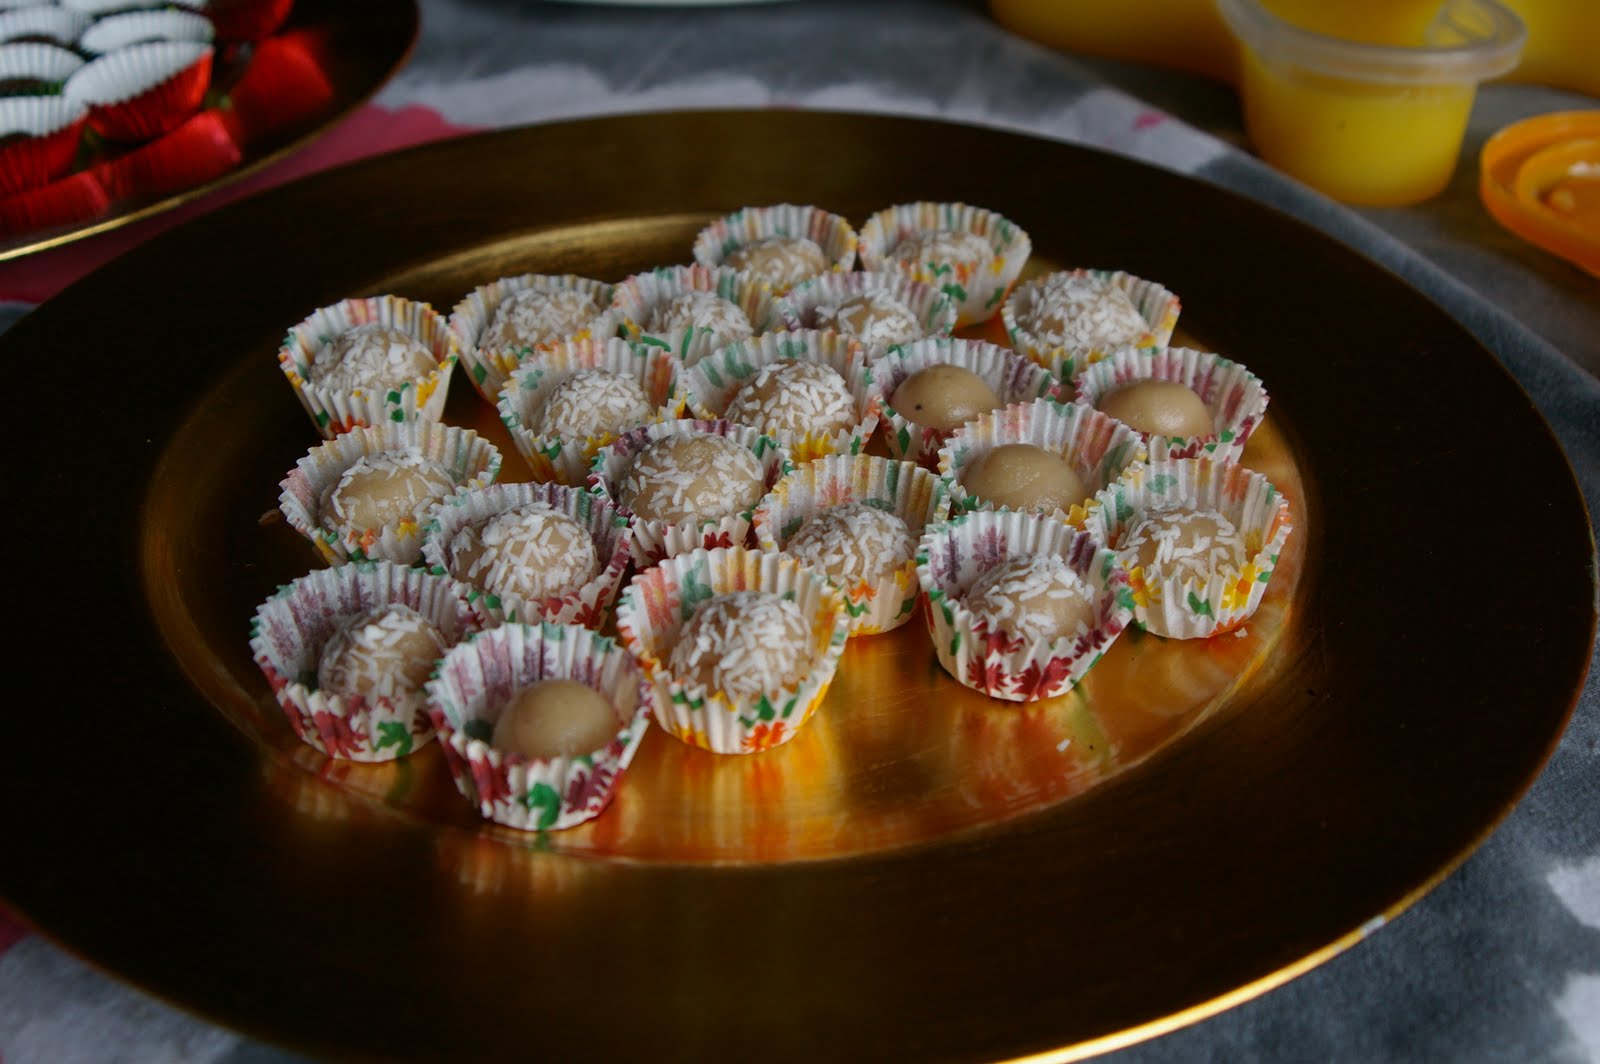
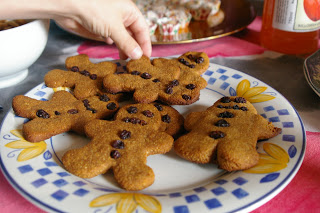
The prospect of having a party without sugar had given me a few sleepless nights and I spent many hours on the web looking up recipes. I couldn't even picture what the table would look like without the usual party treats. No jellies, no sweets and none of my famous chocolate chip muffins. Crisps, popcorn and tortilla chips were all off the menu too. But I'm here to tell you that it IS completely possible to have a sugar-free party. We managed it, and it was a great success. I found plenty of recipes on www.pecanbread.com and www.scddatabase.com. I made marzipan sweets and toffee and presented them in cute coloured mini-muffin cases. My sister made gingerbread men, with cool currant faces and buttons, they looked fab! There was also orange jelly in a shaped mould, little bowls of strawberries, raspberries and raisins. Now, there were one or two of the kids who looked at the table despairingly, probably wondering "What's all this weird fruit and stuff?" But they all ate something. And they had fun. And no-one went home hyperactive!
The cake has always been an important element of parties at our house. I have often been up until 3am the night before a party, putting the finishing touches on a masterpiece, whether it be a fairy princess castle, a train or a pirate hat. This year I had accepted there would be nothing too fancy, no sugar means no sugarpaste icing and there are limits to using honey. Still, at least I would get to bed early! I've been making pineapple upside-down cake fairly regularly over the last few months so I decided that would serve well as a birthday cake and I adapted a recipe for meringue frosting to cover the cake. The final touch was to decorate with golden raisins. Simple but effective.
Pineapple upside-down cake
(from Raman Prasad's "Recipes for the Specific Carbohydrate Diet")
220g almond flour
3 eggs
55g butter, melted
160g honey
3/4 tsp vanilla extract
pinch cinnamon
230g fresh pineapple, thinly sliced
Preheat the oven to 180 C, gas mark 4. Grease a 20-23cm baking dish, I use a spring-form tin.
Mix all the ingredients, except the pineapple, in a food processor until smooth. Layer the pineapple slices on the bottom of the baking dish and then pour in the cake batter and spread it evenly. Bake for 30 to 40 minutes. Take it out of the oven, allow it to cool for about 15 minutes and then carefully turn it out onto a plate (this is where the spring-form tin is very useful) so that the pineapple is on the top of the cake.
This cake is really delicious as the juice from the pineapple seeps into the cake, giving it a lovely flavour. The cake really doesn't need frosting, I just felt the need to have an iced cake for a birthday party!
Meringue Frosting
4 egg whites, at room temperature
dash of salt
160g honey, runny
150g unsalted butter, softened
Make sure your bowl and whipping attachment are dry as one drop of water will ruin your meringue.
Whip the egg whites until they are white and form soft peaks.
Slowly drizzle the honey while continuing to whisk, and add a dash of salt.
Beat the butter in a separate bowl until light and fluffy. Add the meringue gradually, beating well after each addition until thick and fluffy. Spread immediately over the cake and smooth with a palette knife.
You can flavour the icing with some grated lemon or orange rind, about 2 teaspoons of it is enough for a good sized cake. I haven't experimented with colouring yet, I will have to do that for the next birthday party!
The party was the following day. Usually little Einstein's birthday parties are outdoor affairs where the kids run wild around the garden and the adults have very little to do but sit around and chat! Unfortunately this September the weather did not behave for us. It rained on and off, but we made the best of it, and the kids all got outside, from time to time, for brief spurts, usually legging it from the house to the treehouse, or running after a chicken and getting very muddy shoes.
The prospect of having a party without sugar had given me a few sleepless nights and I spent many hours on the web looking up recipes. I couldn't even picture what the table would look like without the usual party treats. No jellies, no sweets and none of my famous chocolate chip muffins. Crisps, popcorn and tortilla chips were all off the menu too. But I'm here to tell you that it IS completely possible to have a sugar-free party. We managed it, and it was a great success. I found plenty of recipes on www.pecanbread.com and www.scddatabase.com. I made marzipan sweets and toffee and presented them in cute coloured mini-muffin cases. My sister made gingerbread men, with cool currant faces and buttons, they looked fab! There was also orange jelly in a shaped mould, little bowls of strawberries, raspberries and raisins. Now, there were one or two of the kids who looked at the table despairingly, probably wondering "What's all this weird fruit and stuff?" But they all ate something. And they had fun. And no-one went home hyperactive!
The cake has always been an important element of parties at our house. I have often been up until 3am the night before a party, putting the finishing touches on a masterpiece, whether it be a fairy princess castle, a train or a pirate hat. This year I had accepted there would be nothing too fancy, no sugar means no sugarpaste icing and there are limits to using honey. Still, at least I would get to bed early! I've been making pineapple upside-down cake fairly regularly over the last few months so I decided that would serve well as a birthday cake and I adapted a recipe for meringue frosting to cover the cake. The final touch was to decorate with golden raisins. Simple but effective.
Pineapple upside-down cake
(from Raman Prasad's "Recipes for the Specific Carbohydrate Diet")
220g almond flour
3 eggs
55g butter, melted
160g honey
3/4 tsp vanilla extract
pinch cinnamon
230g fresh pineapple, thinly sliced
Preheat the oven to 180 C, gas mark 4. Grease a 20-23cm baking dish, I use a spring-form tin.
Mix all the ingredients, except the pineapple, in a food processor until smooth. Layer the pineapple slices on the bottom of the baking dish and then pour in the cake batter and spread it evenly. Bake for 30 to 40 minutes. Take it out of the oven, allow it to cool for about 15 minutes and then carefully turn it out onto a plate (this is where the spring-form tin is very useful) so that the pineapple is on the top of the cake.
This cake is really delicious as the juice from the pineapple seeps into the cake, giving it a lovely flavour. The cake really doesn't need frosting, I just felt the need to have an iced cake for a birthday party!
Meringue Frosting
4 egg whites, at room temperature
dash of salt
160g honey, runny
150g unsalted butter, softened
Make sure your bowl and whipping attachment are dry as one drop of water will ruin your meringue.
Whip the egg whites until they are white and form soft peaks.
Slowly drizzle the honey while continuing to whisk, and add a dash of salt.
Beat the butter in a separate bowl until light and fluffy. Add the meringue gradually, beating well after each addition until thick and fluffy. Spread immediately over the cake and smooth with a palette knife.
You can flavour the icing with some grated lemon or orange rind, about 2 teaspoons of it is enough for a good sized cake. I haven't experimented with colouring yet, I will have to do that for the next birthday party!
Thursday, 25 August 2011
An SCD Holiday
So, we are just back from a week in the UK. We went to Newcastle for a family wedding and I thanked the bride sincerely for getting married and giving us an excuse for a holiday! We probably wouldn't have dreamed about having one otherwise! It was a daunting prospect as the thought of being away in a strange house with God-only-knows-what-kind-of-kitchen was a bit worrying. And being on SCD means no easy frozen pizza dinners or take-away meals so its kind of a working holiday!! Still, I'm happy to report it was all worth it and we had a fantastic week. The kitchen in our apartment was well-stocked and I managed to borrow the only 2 things missing (a food processor and a weighing scales) from the groom's Mum. This wonderful lady had also done a bit of shopping for us, so when we arrived at the apartment (quite late) there was butter, eggs and freshly pressed apple juice waiting for us. So we didn't have to worry about shopping before breakfast!
Packing was interesting. It was our first foreign holiday for quite a while and I had no idea if it was ok to bring food on the plane, in either checked baggage or hand luggage, so I took a chance and packed a couple of kilos of ground almonds, a loaf of almond bread and a jar of coconut oil. I also brought two silicone baking moulds, for making bread and cake. I had been wondering about what to bring for the plane journey. We hadn't flown for four years and the last time, all the kids had experienced pain in their ears. Lollipops or sucky-sweets usually help this but we couldn't have those on this trip so I just brought some cookies in my bag and hoped for the best. Thankfully none of us had any ear issues at all, I don't know if this is thanks to the diet, or maybe because it was such a short flight!
Shopping was interesting too, if that's the right word. The fresh poultry section in the large local supermarket was so small, I wonder what on earth are they eating over there! The ready-meals section was 3 aisles long and the chicken section was 3 feet long!! We ate a lot of chicken for pure convenience. I could put it in the oven, then go to the park or beach for two hours, then arrive home and just cook the veggies. This kind of dinner was handy too, to keep the work-load down. We brought picnic lunches with us most days, with almond bread sandwiches, banana pancakes, juice and lots of fruit. And there was a big flask in the apartment which we filled with coffee and brought along too! The kids absolutely love the novelty of having picnics and it helps to make up for the lack of ice-cream or candy floss or anything else you might eat when on holiday! Of course it's important to have some kind of sweet treat or snack (it is a holiday after all!) so we had banana cake, nut cookies, raisins or banana chips with us at all times!! Did I mention it was a working holiday?!?
The wedding itself went off without a hitch and the lovely staff at the Elephant on the Tyne Hotel looked after us in a kind and discreet manner. I had been in touch with them about our particular dietary requirements and they were very accommodating. And the kids didn't mind having melon and strawberries when everyone else was having cake and ice-cream, they are amazing! We had a great time at the evening party too and even managed to eat some food, from the most impressive buffet I've ever seen. My daughter and I went up with a plate just to grab some grapes but we came back with pineapple, melon, baked salmon and blue cheese. We didn't give any of these to little Einstein, that would be taking too much of a risk. He was happily entertained with the helium balloons, and a couple of cookies from my bottomless handbag!
Somewhere along the way, in the last few days of the holiday, little Einstein started to get a bit grumpy. He had a few tantrums and a few tears. This could possibly be explained by the change in routine, the strange place, the plane journey or a multitude of other reasons, but I can't help thinking it may be food related. We were careful, but not as careful as we would be at home. We ate chicken of dubious quality, we bought juice brands we didn't recognise, we ate eggs which were like rubber! But there had to be some compromise in order for us to actually have a holiday. And we really did have a thoroughly enjoyable, long-overdue holiday! We are home a few days now and he is coming back to himself, still a bit teary but no more tantrums. It has been a good reminder that we need to stick to this diet, and we will!
Saturday, 16 July 2011
The Horse-Boy
I recently went to see Rupert Isaacson give a demonstration of his "horse-boy method" for children with special needs. It was a fascinating day and he had a really positive attitude to special needs and autism in particular. You can check out his foundation here: http://www.horseboyfoundation.org/
There was also a screening of his film "The Horse-boy" which tells the story of their family's trip to Mongolia to spend time with the horse-people and Shamans who live there in the hope of helping their autistic son. Now, whatever you might think about Shamans and that kind of thing, the child's improvement over the course of the film is undeniable. The thing that really struck me was the change in his eyes. It is the same change I've seen in little Einstein's eyes over the last six months. His eyes are different. I've already mentioned how people notice that he looks AT them now and not THROUGH them as he did before. This was evident in the child in the film too. There is more though. It's almost as if his eyes have opened. They are clear and vivid and curious.
One of the other things I didn't mention before is expressions. Like many autistic children, little Einstein's face was often flat and expressionless. In the last few months I've seen so many expressions on our little man's face. The first time I noticed them was a moment I won't forget. We had come in from a walk and he was tired, and upset and didn't know what to do with himself. I was asking what was wrong and trying to motivate him to do something, and he was annoyed with me. He was sulking and being awkward. I was on the brink of feeling frustrated when I suddenly realised he was making lots of different faces - sad, worried, annoyed, angry faces - expressions!! Thankfully these days, the main expression on his face is pure happiness! And he is always laughing.
Rupert Isaacson mentioned over the course of the day that a great way to connect with kids is by using toilet humour. In the film we see the family struggling with their son's incontinence but trying to make it funny by referring to accidents as a "Code Brown!" Coincidentally, we are going through a toilet humour stage in our house too, but the great thing about it is that all three kids are participating. They are constantly telling me new "Poo" jokes and little Einstein races his brother to tell me the joke first! They are sharing the jokes and making up songs, and interacting constantly. He is even initiating games with his brother and sister. And if they say no, he says "OK!" and doesn't have a melt-down!! My favourite sound in the world is the sound of his voice shouting "Come on guys!"
There was also a screening of his film "The Horse-boy" which tells the story of their family's trip to Mongolia to spend time with the horse-people and Shamans who live there in the hope of helping their autistic son. Now, whatever you might think about Shamans and that kind of thing, the child's improvement over the course of the film is undeniable. The thing that really struck me was the change in his eyes. It is the same change I've seen in little Einstein's eyes over the last six months. His eyes are different. I've already mentioned how people notice that he looks AT them now and not THROUGH them as he did before. This was evident in the child in the film too. There is more though. It's almost as if his eyes have opened. They are clear and vivid and curious.
One of the other things I didn't mention before is expressions. Like many autistic children, little Einstein's face was often flat and expressionless. In the last few months I've seen so many expressions on our little man's face. The first time I noticed them was a moment I won't forget. We had come in from a walk and he was tired, and upset and didn't know what to do with himself. I was asking what was wrong and trying to motivate him to do something, and he was annoyed with me. He was sulking and being awkward. I was on the brink of feeling frustrated when I suddenly realised he was making lots of different faces - sad, worried, annoyed, angry faces - expressions!! Thankfully these days, the main expression on his face is pure happiness! And he is always laughing.
Rupert Isaacson mentioned over the course of the day that a great way to connect with kids is by using toilet humour. In the film we see the family struggling with their son's incontinence but trying to make it funny by referring to accidents as a "Code Brown!" Coincidentally, we are going through a toilet humour stage in our house too, but the great thing about it is that all three kids are participating. They are constantly telling me new "Poo" jokes and little Einstein races his brother to tell me the joke first! They are sharing the jokes and making up songs, and interacting constantly. He is even initiating games with his brother and sister. And if they say no, he says "OK!" and doesn't have a melt-down!! My favourite sound in the world is the sound of his voice shouting "Come on guys!"
Monday, 6 June 2011
It's bread Jim, but not as we know it...
Bread is comfort food. Easy, fast, convenient and adaptable comfort food. We use it every day, some of us even eating bread at every meal. Kids especially love their sandwiches and toast. So, it would be very difficult to manage without it, but as this diet is grain-free that means no wheat, rye, corn, spelt or any other kind of bread. The GFCF diet allows gluten free bread but these breads are highly processed and still contain a lot of ingredients which would be very hard on a sensitive or damaged gut. SCD allows no grains at all so we make our bread from nuts!
This bread is really easy to make. It doesn't contain yeast so there is no resting time. It is more like making cake really. I make a loaf every night. It is a very adaptable recipe. You can add salt, pepper, herbs, or grated cheese for a savoury version or apple, banana or raisins for a sweet version.
Basic everyday SCD Bread
60g butter, melted
3 eggs (I use duck's eggs, I find the bread rises really well, but large or extra-large hens eggs work fine)
1 tablespoon honey
280g ground almonds
1 pinch baking soda
Put your melted butter into a good-sized bowl, add the 3 eggs and whip them together with a fork until they are nice and yellow and well mixed. Add the honey and give it a quick stir. Then add the ground almonds and baking soda and mix well. You can use an electric mixer for this but I just use a tablespoon, it comes together very easily and doesn't need to be mixed for too long.
When it is well-mixed, and looks a bit like thick yellow porridge, turn it into a loaf tin. I line mine with parchment paper as the tin is ancient and looking a bit rusty! But if you have a nice new tin you can just grease it with butter. Smooth the top of the bread. Bake for one hour at low temperature, 150-160 C, Gas mark 2 or 3. I usually bake it at Gas 3 for the first 45 minutes and then turn it down to Gas 2 for the last 15 minutes. You need to watch it in the last 15 minutes as the top might burn so if it's looking a bit dark, cover it with foil.
After an hour, take it out and cool it on a wire rack. It is totally delicious hot and smothered in butter! It toasts well too!
This bread is really easy to make. It doesn't contain yeast so there is no resting time. It is more like making cake really. I make a loaf every night. It is a very adaptable recipe. You can add salt, pepper, herbs, or grated cheese for a savoury version or apple, banana or raisins for a sweet version.
Basic everyday SCD Bread
60g butter, melted
3 eggs (I use duck's eggs, I find the bread rises really well, but large or extra-large hens eggs work fine)
1 tablespoon honey
280g ground almonds
1 pinch baking soda
Put your melted butter into a good-sized bowl, add the 3 eggs and whip them together with a fork until they are nice and yellow and well mixed. Add the honey and give it a quick stir. Then add the ground almonds and baking soda and mix well. You can use an electric mixer for this but I just use a tablespoon, it comes together very easily and doesn't need to be mixed for too long.
When it is well-mixed, and looks a bit like thick yellow porridge, turn it into a loaf tin. I line mine with parchment paper as the tin is ancient and looking a bit rusty! But if you have a nice new tin you can just grease it with butter. Smooth the top of the bread. Bake for one hour at low temperature, 150-160 C, Gas mark 2 or 3. I usually bake it at Gas 3 for the first 45 minutes and then turn it down to Gas 2 for the last 15 minutes. You need to watch it in the last 15 minutes as the top might burn so if it's looking a bit dark, cover it with foil.
After an hour, take it out and cool it on a wire rack. It is totally delicious hot and smothered in butter! It toasts well too!
Subscribe to:
Posts (Atom)